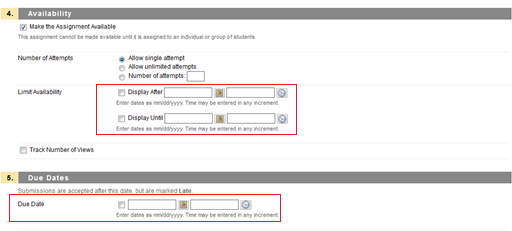
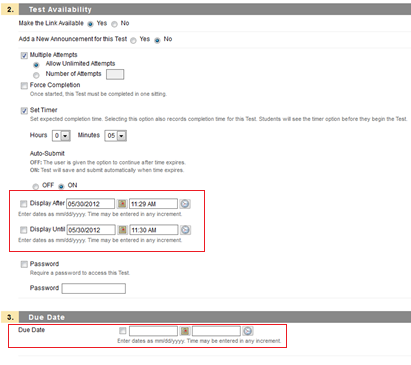
In assignment and test settings you have the option of setting three dates: Display After, Display Until, and Due Date.
Display After* – First date/time the assignment will be viewable for the students.
Display Until* – Last date/time the assignment will be viewable for students. Students who are completing a test or assignment attempt will not have their sessions interrupted by the display until date expiring.
Due Date* - used by the Notification system to fill in the "To Do" module for students to know when an upcoming test/assignment/etc. is going to be due (or is past due). The Notification system also uses the Due Date to fill in the instructor's "Alerts" module that lets them know when students have tests or assignments that are past due.
*Please keep in mind that you must check the box to the left of a date item if you want the date to apply. Simply putting a date/time in the available areas does not make the date/time applicable.
Dates in Assignment settings:
Dates in Test options:
For more information about creating Assignments in Blackboard, visit
http://www.uhd.edu/computing/ttlc/training/documents/bblearn/Assignments_Creating.pdf
Additional information regarding Test creation in Blackboard can be found at
http://www.uhd.edu/computing/ttlc/training/documents/bblearn/Assessments_Creating.pdf
Please contact UHD Blackboard Support at 713-221-2786 if you have any questions.
Thursday, May 31, 2012
Allowing multiple attempts on tests?
If multiple attempts are allowed on tests the students must click the "take the Test again" link to begin remaining test attempts. Students begin remaining test attempts by:
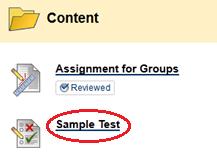
1) Students navigate to their test and click on the test name.
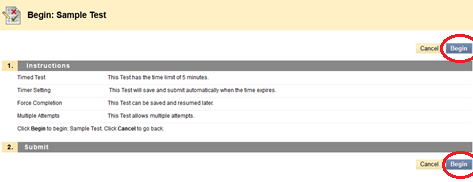
2) In the "Begin test" window, students will click Begin (top or bottom link) to start the test.
3) If there is a previous test attempt, students will see the "Test previously taken" window. In this window students should click on the take the Test again link.
Note: The OK button DOES NOT begin a new attempt. Students clicking the OK button in the Test Previously Taken window will be taken to their previous attempt information.
Additional information on Blackboard test creation can be found at
http://www.uhd.edu/computing/ttlc/training/documents/bblearn/Assessments_Creating.pdf
Training documents and videos for UHD Faculty and Staff are available at
http://www.uhd.edu/computing/ttlc/training/#fragment-2
Please contact UHD Blackboard Support at 713-221-2786 if you have any questions.
Wednesday, May 2, 2012
Assignment & Test Feedback Options
Assignments
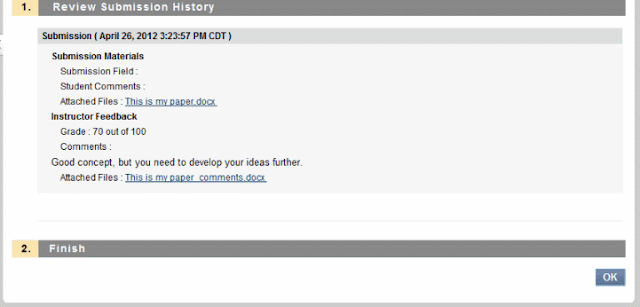
While grading assignments, instructors can provide comments
as well as upload a revised version of a student’s submission that contains
comments within.
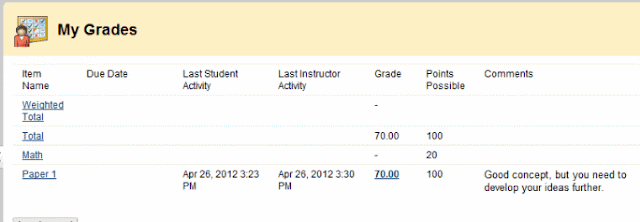
These comments can be seen by students using the My Grades
tool, as long as the assignment column is set to be visible to students.
Clicking on the grade score will provide more details to
students. Now the file the instructor
attached can be opened.

Tests
1. To see the test options area, click the action link next to the test and click Edit Test Options.
2. Scroll down to section 5: Test Feedback. This governs what students see in their grades area.
2. Scroll down to section 5: Test Feedback. This governs what students see in their grades area.
This can be set so that when the test is available to
students, only the Score is available to them upon completion of the test. Then once the
availability period is over, all options may be checked so that students can
see the correct answers.
Students can review their tests by clicking the link of the score they received in My Grades.
Too many rows in your grade center?
Do you wish you could hide Grade Center rows so that you can show grades to only one student? Are you tired of seeing unavailable students in your Grade Center?
Setting the Row Visibility in your Grade Center is the answer!
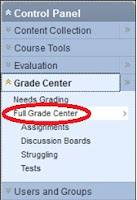
1. To change row visibility, select Full Grade Center from the Control Panel.
2. Click the Manage button at the top and select Row Visibility from the drop-down list.
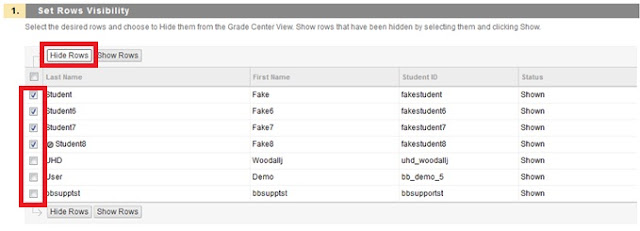
3. A list of Grade Center rows comprised of student names will appear. Select the check box beside the rows you wish to hide, and click the Hide Rows button.
Please note that unavailable students are designated with a circle-backslash icon.
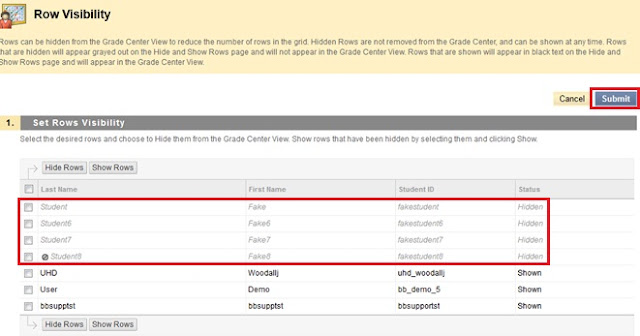
4. After you click Hide Rows, the rows you have selected will become italicized. Click the Submit button.
Please contact UHD Blackboard Support at 713-221-2786 if you have any questions.
Subscribe to:
Posts (Atom)
