Thursday, October 17, 2013

Embedding a Prezi Presentation into Blackboard Course Content

    1.   Log in to Blackboard.

    2.       Enter the course where you want to add your Prezi slide presentation.

    3.      Make sure to turn edit mode ON at the top.


       4.      Go to your course menu and select a Content area

    5.      On the open content page click the Build Content button, and then select Item.


    6.  In the open Item window, fill in a name for the Prezi presentation; add an explanation to the text box, if needed, then click the HTML Code View option.


     7. Go to your Prezi site (http://www.prezi.com) login to your Prezi account. Select the Prezi you want to embed into your course, click the Embed button and copy the embed code.


8.   Return to the open HTML Code View and paste the Embed code into the HTML Code View window.  

       
 9.      Click the Update button to close the HTML Code View screen and your Prezi will be embedded into the Content Item window. 

         
10.  Your embedded Prezi slide presentation is posted into your course content.


Monday, September 9, 2013

Attendance: Check Users' Last Course Access in Blackboard


The Last Access column, which is included by default in the grade center, contains the date of the last course access for each user. 

Check the last course access:
1. Under the Course Management area select Grade Center, Full Grade Center.
The last access column is located with the other default columns in Blackboard 
(Last Name, First Name, Student ID, Last Access, and Availability).

 If this column is not visible it could be hidden and can be added by showing the column.

Show hidden columns:
1. Under the Course Management area select Grade Center, Full Grade Center.

2. Move the cursor over the Manage button and select Column Organization. 

3. The default columns are displayed at the top of the page and will be marked hidden if they are not visible in the full grade center.

4. Select the check box and move the cursor over the the Show/Hide button.  Click show selected columns. 

5. Select Submit to save.

Friday, September 6, 2013

Creating a Discussion Thread with a Video


NOTE: This function requires a YouTube account.

Responses and original threads can be recorded using your computer’s webcam in the Discussion Board by logging into YouTube and publishing content.  This functionality is available not just in Discussions but anywhere you find the text editor.  

1.         Select the course menu item where the discussions are located. Select the discussion you are responding to. 


2.         Select the Create Thread button


3.         Give the thread a subject line and select the webcam icon.
 
NOTE: If you do not see the icon select the double arrow on the right side of the text box.

4.         Select “Record from webcam” from the following pop-up window

5.         Select “Allow” from the Adobe Flash Player Settings to activate the camera.  Select Start recording to record your message, when you’re done press Stop recording.  


6.         Select the upload button that appears after the recording has stopped.

7.         Select the sizing options preferred and select insert

8.         The video is now added in the text area.

9. Add any attachments desired and select submit.  
10.       The video will appear in the discussion forum and user can reply by selecting reply. 

Friday, August 9, 2013

Things to Consider when Developing your Course Menu

Do you strive for order and consistency in your online courses? If so, you’ll want to be aware of the different ways to organize your course menu in SP11. Although you’ll use a desktop or laptop to develop your course, more and more of your students will be viewing that content on a handset or tablet via the Blackboard Mobile Learn app. Check out the free app for your Android or iOS device to test the differences across traditional and mobile platforms.
  •  Menu items include Content Areas, Tool Links, Subheaders, and Dividers (among other things)
  • All items can be added to your menu by clicking the Add Menu Item button 
  • Menu items can be deleted, shown/hidden, or renamed by clicking the action link to the right of the item 
  • Check out this Course Menu link for more helpful tips!


Thursday, August 1, 2013

NEW Discussions Option! Participants must create a thread in order to view other threads in a forum.

Now discussions have additional control by limiting a users’ view of other posts unless they have posted at least one thread.  This prevents students from sifting through responses before submitting their own. 

In creating a Forum you will fill out sections 1 and 2 (Forum info and Forum availability).
Under Section 3 Forum settings, a new option appears titled Viewing Threads/Replies.  Select Participants must create a thread in order to view other threads in this forum.  This option prevents students from seeing what others are posting prior to posting their own response to the initial discussion assignment.  

Once you have chosen and verified the Discussion settings, click the Submit button.

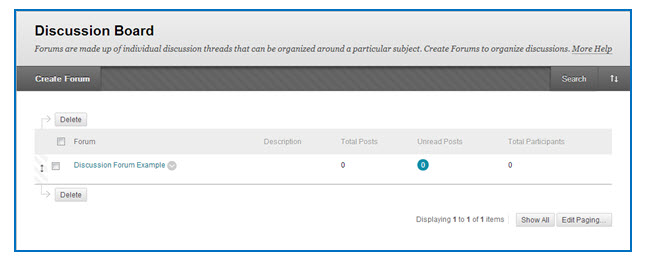
The new Forum will now be listed in the Discussions Boards area. To view its entries, click its title.
For more info about Discussions click HERE