Thursday, January 31, 2013

Add Speak Command to Word


If you have ever tried proofreading your own writing, you know that it is almost impossible to catch every mistake. This is mostly because your brain already knows what you are trying to say. What your eyes read on the page and what you see in your head are not always the same. Here is a quick way of preventing most “invisible typos”: Use the Speak command on Microsoft Word. Preventing these typos help improve both quality and presentation. The Speak Button can also be beneficial when reviewing what you have written. As the instructor, it can be difficult to assess if the assignment instructions are confusing.  Have the Speak command read the instructions aloud and decide if they are clear and concise.

Add the Speak command to your Word Quick Access Toolbar by following these instructions:

1. Go to File and select "Options".

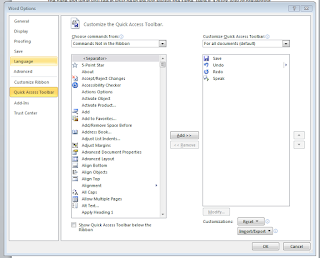
 2. Click on the Quick Access Toolbar. On the dropdown menu select "Commands not in the Ribbon".

3. Scroll down to find the Speak button, add it to the quick access toolbar and click Ok.

4. You will now have Save, Undo, Redo, and Speak in the Quick Access Toolbar.


The Speak Button will now be available in every document, new or old. Whenever you are done writing, highlight the most recent passage or the entire document and click Speak. The text will be read aloud and you can listen closely and note any typos, grammatical errors, etc.

To get rid of the Speak button, follow steps 1 and 2, click Remove from Quick Access Toolbar and click Ok.

Note: The Speak command is not a replacement for a fresh pair of eyes or a proofreader, but if you want to revise your work before asking someone else it definitely helps.

Wednesday, January 30, 2013

Upload an Image to Blackboard: Flickr Photo Mashup

Go to content, hover over build content, click on Flickr Photo.


There are two ways to get content from Flickr:
  • Go to flickr.com and log in or create an account; search the site for the image you want to upload, once you find it, on the top of the image there will be sharing icons. Highlight the url link and copy and paste to the Blackboard Search bar.
 

  • In the Search bar look for the type of image you are looking for.


  • Once you find the image you want to upload, click on Select.


  • Select from the various options given:
    • Mashup options
    • Attach or link content
    • Options
    • Submit 


  • Once you are done click Submit.


Wednesday, January 16, 2013

Embed a Twitter App into Blackboard


Twitter is a social network with a limit of 140 characters. Do not be fooled by the character limitation. It is still a powerful platform for networking with leaders in a variety of fields and searching for information. Twitter also has these things called widgets that can be embedded in websites using the html script provided. This guide will walk you on how to obtain such a widget for your class, and also how to embed it into the course. But first, what are some ways of implementing a twitter feed in your blackboard? I know one professor that would tweet the answers to the study guide as the final approached, meaning the student could cross-check and make sure they had the right answer. Twitter lets you create lists of things you like to know about; create an account and follow the accounts of various leaders in the field of study and link the list into Blackboard. Twitter’s famous # (hash-tags) are the way in which subjects are separated into “trending topics”; for example, search for #CogSci, #Economics, #Literature, #Math, etc. and provide students with news and information from individuals within that field of study. Ready? Let’s begin: 

1.  Inside the course click on the Content folder you wish to insert the Twitter App into.


 2.  Click on Build an Item. In the new window that pops up click the toggle HTML source mode (<>) in the text editor.


Now go to twitter.com and log in or, if you prefer, create a new account.


1. Once you are logged in, go to Settings and click on Widgets:  Create New.


2. In the "configure a search widget" you have 4 tabs: User timeline, Favorites, Lists, Search. For this example, the search tab was chosen. On the options fields fill out: search query; add (if any) customized height options; select the theme (light or dark); the link color; fill out the domain as: bb.uhd.edu; when you are done click on the Create Widget.


3. When you click on Create Widget, it will create an html script that you can embed into Blackboard. Copy and paste the script into the Blackboard text editor with HTML Source turned on.


4. Click Submit.


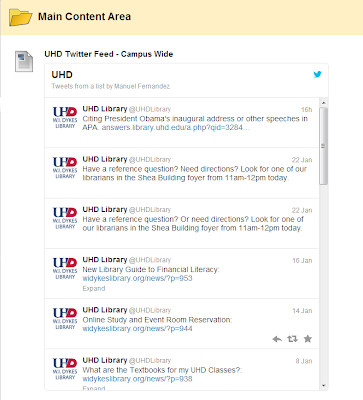
The last image shows what your twitter app will look like.


Friday, January 4, 2013

Switching Between Java Versions


Java allows you to have multiple versions installed at the same time.  If you have a program that wants the latest version, and another that wants an older version, you can have them both installed and switch between the two.


Windows:

1. Access your PC’s Control Panel. 


2. Double-click Java.

3. Click on the Java tab, then click the view button.

4. Use the Enabled check boxes to choose the appropriate version of Java. Press Ok to save your changes.