Wednesday, July 17, 2013

Weighted Columns: Equally vs Proportionally


Grades can be weighted both equally and proportionally in Blackboard depending on the point values of each grade center column.  Using the Weighted Total Column will allow application of weighted percentages (rather than a summed total of points which is the Total Column’s function).  Both Total and Weighted Total columns are available in the Grade Center by default.

Weighted Total Column- A Weighted Column calculates and displays a grade based on selected assessments, or categories of grades, to calculate the total grade.
Instructions for creating a weighted column are below:
Weighted Grade Column
The following displays the workflow for creating a Weighted Grade Column based on four (4) columns:

  • Mid-term Exam = 20%
  • Final Exam = 30%
  • Assignments Category = 25%
  • Quizzes Category = 25%


To create the Weighted Grade Column, do the following:


  1. Move the cursor over the Create Calculated Column icon in the Action Bar of the Grade Center.
  2. Select Weighted Column
  3. Enter a Column Name.
  4. Enter a Grade Center Display Name.
  5. Enter a Description.
  6. Select Primary Display and Secondary Display options from the drop-down menus available.
  7. Select the items to be included in the Weighted Grade Column, and enter the percentages for each Column or Category to be included in the Weighted Grade.


Columns to Select – A list of all columns in the Grade Center. Select the Column and click the arrow to add it to the Weighted Grade column.

*Categories to Select – A list of all Categories in the Grade Center. Select the category and click the arrow to add it to the Weighted Grade column.

*With a weighted total column Blackboard assumes equal points per assignment unless you specify otherwise.  You have to specify proportional if the total available points is different for each assignment.


If you’re weighting by category AND you have different points associated with different assignments within the same category you should weight proportionally.  Blackboard will calculate the weighted total by dividing by the total points available and not assume each assignment is worth the same amount of points.  OR you could make all of your assignments worth 100 points and keep it at equally.


Thursday, June 20, 2013

New Feature in Blackboard This Fall-Automatic Calendar Sync

In the latest upgrade Blackboard provides you with a better calendar function, which includes other courses in your calendar and assignment synchronization. When adding an assignment in a Blackboard Content area Blackboard Learn will now automatically link to the calendar tool.


Selecting the Due Date option adds the assignment directly to the calendar.

Select Calendar from the Course Menu
An event with the description appears in the calendar area.


Thursday, May 16, 2013

End of the Semester Checklist

The end of the spring semester is here! Here's a cool and handy checklist that you can mark off with what you should do at the end of any semester:

Have you archived your course?
Have you saved a version of your grade center?
Saved a version of your grade center?
Moved your content to BB2?

Thursday, May 9, 2013

MAY and SUMMER 2013 Online Courses are in Blackboard 2!


Just a Reminder! 

Blackboard is getting a much needed makeover this summer. While our primary environment is getting all dolled up, the May Mini Term and all Summer courses will be held in a separate environment: Blackboard 2 (https://bb2.uhd.edu/). 

To ensure that you are in the right place, you may want to visit the UHD Blackboard Information page (http://www.uhd.edu/blackboard/) and select the log-in button. The correct log-in screen should look like this:


If you have any questions, please feel free to contact Blackboard Support at 713.221.2786.
Please spread the word!

Thursday, April 18, 2013

Gradebook Issues with IE 10

There is an bug that can occur between IE 10 and the Grade Center inside of Blackboard Learn. The bug will make the Gradebook disappear, your columns and grades will still be there, but you will not be able to see them.

The current solution is to switch to Firefox or Chrome browsers.


Thursday, March 21, 2013

Powerpoint and Youtube Compatibility Issue


At the time of this writing there seems to be an issue with embedding Youtube videos into Powerpoint. It is recommended that you link to the video rather than copy and paste the embed code from Youtube.com. Embedding the video into Powerpoint will not play it.


UPDATE: Follow the instructions on this video as a work around for the current issue with youtube and powerpoint.


Slideshare Presentations

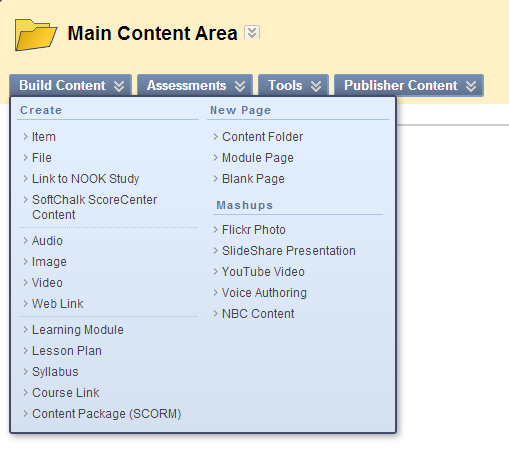
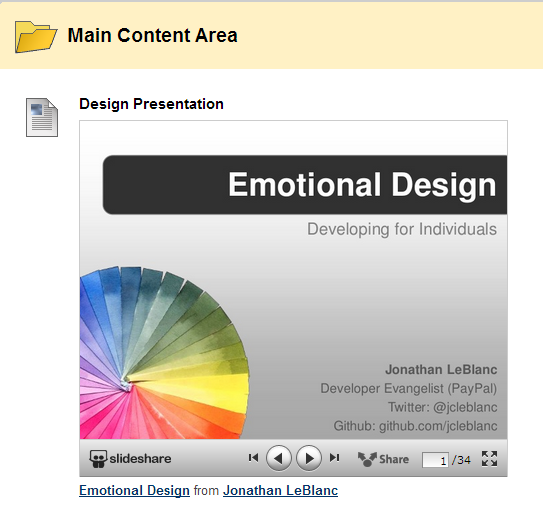
The current Mashup tool for inserting Slideshare Presentations is having API issues, so it is non-responsive.  But this does not mean that you can no longer insert Slideshare presentations into your class. Here are six steps on how to insert a Slideshare Presentation into Blackboard.

1. Create an item


2. Turn on HTML editor


3. Visit Slideshare; find the presentation you would like to use.


4. Click on embed and click copy.


5. Switch back to Blackboard Learn; paste the HTML code into the text field, click Submit.


6. Preview the presentation inside Blackboard.


Thursday, February 21, 2013

Add Banner Image to Your Class


In continuing with the topic of customization, buttons are not the only thing that can be changed about your class.

Click on Customization.


1. Click on Teaching Style. It will open a list of options, scroll down to section 6 to upload banner.


2.  Click on Browse My Computer to find the image you want to upload. The recommended measurement for a banner is: 1000 px X 200-250 px.

3. Once you find the image, select the image and click open. The file will be attached. You can click Do not attach, if you clicked the wrong file.


4. When you have selected the right file and it has been attached to Blackboard. Scroll down to section 7 and click submit.

5. After clicking submit, you will be taken to the customization tab. It show a message in green saying: "Success: Course Style updated."
6. Go to the homepage to see the new banner that your students will see when they visit your course.

Note: Make sure to use an image that will meet the recommended measurements.


Thursday, February 14, 2013

Customizing Buttons


 Change the color of your course buttons and help students immediately recognize your course.
  
The options for button colors are separated into patterns, striped, and solid colors. You are also able to select whether the buttons have squared, rounder corners or round buttons.

1.       Go to Control Panel below the words "Course Management".  In the Control Panel à Customization à Teaching Style section.


2.       Section  choose color pattern or text/buttons


  1. When you find a style and color that meets the desired look of your course. Scroll down and click Submit.

  1. Let us look at the difference:


Thursday, February 7, 2013

Print an Exam using Respondus

If you have a test on Blackboard you would like to administer face to face rather than online, the web browser's print feature is not enough. One alternative is Respondus Campus Wide. Respondus Campus Wide allows you to download the tests as a word document and print it out.

To begin open Respondus Campus Wide (RCW); if you do not have RCW installed and would like to use it. Contact the TTLC: 713-221-8200

1. Once you open Respondus go to Retrieval & Reports Tab. Within the Tab, click on Retrieve Questions.
2. You should have the Blackboard Server information already filled out. Click Next, depending on your settings you might be asked to fill out your Blackboard Username and Password.


3. Once logged in, in section 1, use the dropdown menu to select the course to retrieve from.
    a. In section 2, select whether it is an exam, survey, or pool. In this example, select Exam and use the dropdown menu to choose which exam to download.
    b. In section 3, enter a new name for the file.

4. The exam will download and your file saved. Click Ok then Finish.


5. Now click on the Preview and Publish Tab.
    a. Select Print Options
    b. Save to File as a Word Document
    c. Once it is saved, open the Word Document and print from Microsoft Word.