Wednesday, July 25, 2012

Submitting "In Progress" Test Attempts

Do your students have "In Progress" test attempts that need to be submitted? Follow the directions below to submit test attempts for your students:

  1. Enter the course Grade Center from the Control Panel menu.


  2. Click the action link (double arrow) to the right of the In Progress attempt and select the Attempt.

  3. In the Grade Test window, expand the Test Information section. Click the Submit Attempt button.

  4. In the dialog box that appears, click OK.


  5. The test should now have a score in the Test Information section.

For more information on grading tests in Blackboard, please visit
http://www.uhd.edu/computing/ttlc/training/documents/bblearn/Assessments_Grading.pdf


Contact UHD Blackboard Support at 713-221-2786 if you have any questions.

Internet Explorer Security Warning

While working in Blackboard 9 using Internet Explorer you may come across a Security Warning asking "Do you want to view only the webpage content that was delivered securely?" Do not panic! This message displays when you enter a page that has either content or URL links not from a HTTPS source.


To view all content in the Blackboard page, please select No, so that it will allow you to view all content. If you have selected Yes to this message, simply close out of the browser you are working in and start again - when entering the page where this message popped up before, select NO to view all content/links.

To remove the Security Warning window:
  1. Click on the Tools area of your browser and select Internet Options.

    Internet Explorer 8

  2. Internet Explorer 9


  3. In the Internet Options window, click on the Security tab.  In the Internet zone, select the Custom Level button at the bottom.

  4. In the Security Settings - Internet Zone window, scroll down to the Miscellaneous section and under Display mixed content select Enable


  5. For the settings to take effect - click OK at both the bottom of the Security Settings window and the Internet Options window then restart Internet Explorer.

For a list of supported browsers and operating systems for the current version of UHD Blackboard please visit  http://www.uhd.edu/blackboard/browsers.html

Contact UHD Blackboard Support at 713-221-2786 if you have any questions.

Wednesday, June 20, 2012

Adding Demo Student to a Group

There are times when a professor wishes to add their demo student account to Blackboard to view group environments. Follow these instructions to add the course demo student to a group:

  1.  From within the Groups area of the course, click on the action link (double arrow) beside an existing group. Select Edit.

  2. Scroll down to the Membership area, and from the list of names on the left, select User, Demo.

  3. Click the right-pointing arrow to move the selected student into the box on the right.

  4. Once Demo User has been added to the appropriate group, go to Student View from the Course Tools menu at left.

  5. Once in Student View, the group(s) assigned to Demo User will be visible in the Groups area of the course, as well as in the My Groups menu at bottom left.


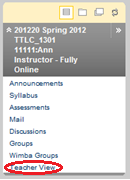
  6. To exit Student View, you will need to click on Teacher View at the bottom of the course menu.


For more information about Blackboard groups, please visit
http://www.uhd.edu/computing/ttlc/training/documents/bblearn/Groups.pdf.

Contact UHD Blackboard Support at 713-221-2786 for support with online course components.

Creating a Group Assignment

Instructors have the ability to create assignments and release them only to specific groups.  Instructors can create a single assignment and assign it to all groups, or create several unique assignments and assign them to different groups. Only the instructor and the members in the group have access to the assignment once it has been properly set up.

When creating an assignment, select the radio button for Groups of Students.


The groups recipient window will expand.

In the Items to Select box, select the group or groups to be included in the assignment. To select multiple groups, press the CTRL key and click each group. You may also select all groups with the Select All function.


Click the right-pointing arrow to move the selection into the Selected Items box. Only groups included in the Selected Items box will be able to view/complete the assignment.


For more information about Blackboard groups, please visit
http://www.uhd.edu/computing/ttlc/training/documents/bblearn/Groups.pdf.

Contact UHD Blackboard Support at 713-221-2786 for support with online course components.

Group Tool Availability

Course groups allow instructors and students to create groups of students within a course. Each group has its own area in the course equipped with tools to assist in the collaborative process.

When creating or editing a group, the instructor may select among several group tools in the Tool Availability section.

The following is a description of the available tools:
  • Blogs - students in the group can create blog entries and add comments to share ideas. Instructors can grade group blogs, but once a group blog is set to be graded, it cannot be changed back to non-graded.
  • Collaboration - students in the group can create and attend real-time chat or virtual classroom sessions.
  • Discussion Board - students in the group can communicate and create/manage their own forums. This group discussion board is available only to its group members, not to all students in the course.
  • Email -  allows group members to send email to each other within the course.  A copy of emails are sent to the sender by default.
  • File Exchange - group members and instructors can use this tool to upload documents to the group area. All group members and the instructor can add, download and delete files, regardless of who added them.
  • Journal - students in the group can share thoughts and communicate with the instructor. Journal entries made in the group journal are visible to all group members and the instructor.
  • Tasks - group members can define and separate the workload into tasks, while distributing the list to the entire group. Each task has a status and a due date to help keep members on track.
  • Wiki - Wikis are used to create a collaborative space that group members can view, contribute, and edit content. By default, group wikis can be read by all course members, but only members of the group can comment or alter a its wiki page.
The selected tools will then appear to the students in the Group Tools module of the group's homepage.

For more information about Blackboard groups, please visit
http://www.uhd.edu/computing/ttlc/training/documents/bblearn/Groups.pdf

Contact UHD Blackboard Support at 713-221-2786 for support with online course components.

Wednesday, June 13, 2012

Passwords in Tests Using LockDown Browser


Blackboard tests can be password protected so that students must type in a password prior to starting the test.  However, if you require Respondus LockDown Browser for your exam, setting a test password follows a slightly different path. 

Normally, you may simply enter a password in the Test Options area of your exam.


But when you require students to use LockDown Browser to take an exam, the password function in the Test Options area is used so that LockDown Browser can verify that students are using LockDown Browser to take the exam.

Caption: LockDown Browser Uses the Password Function

You may use the Respondus LockDown Browser tool to set a password for students.  Enter the password in the Test password (optional) text box.


For more information about the Respondus LockDown Browser Tool, see http://www.uhd.edu/computing/ttlc/training/documents/bblearn/LockDown_Browser_Faculty.pdf


Friday, June 8, 2012

Creating a Content Area

Content areas are like folders, which provide your course structure. They can be created on the course menu or within other content areas (like folders). Follow the instructions below to learn how to create a content area on the course menu.

1. Enter one of your Blackboard courses. Make sure that Edit mode is set to On. Click the blue plus (add menu item button) at the top left of the course menu. 


2.  From the drop-down list, select Create Content Area. 


3.  First, type a name for the content area. This can be anything you want; remember, this is like naming a folder. If you want to place assignments and assessments in the same folder, you may name it “Assessments/Assignments” as depicted in the screenshot below. Click the check box beside Available to Users, and then click the Submit.


4.  The newly-created content area will appear at the bottom of the course menu. Click the name of the content area to enter it.


5.  The content area will not be visible to students until you add content, such as tests, assignments, file links, etc.


Please contact UHD Blackboard Support at 713-221-2786 if you have any questions.

Uploading Files as a Package

Need to upload a zip file of your course documents/materials and want your file/folder structure to remain in place?  Consider uploading your zip file as a package!

1. Create a Zip File of your course documents/materials (call x8200 for help with this).


2. In the Control Panel at bottom left, expand Content Collection and click the course in which you want to add the zipped files.


3. Click on the Upload button and select Upload Package.


4. In the Upload Package window, click on the Browse button and navigate to where you saved your zip file.  Click Submit to start the upload.


5.  If your upload was successful, a green bar at the top will indicate your items have been added.  The folder and file structure added to your zip file should be in place within your uploaded content.*


*Note: If a folder contains no items it will not be created during the import process.

For more information about the Content Collection, here is an official Blackboard document: Blackboard Learn Content Collection

Please contact UHD Blackboard Support at 713-221-2786 if you have any questions.

Using the Groups Viewer Tool

The Groups Viewer tool is an add-on tool (not developed by Blackboard) that lets instructors quickly see group membership.  Previously, instructors would need to individually edit the groups in order to see the student membership.
Groups Viewer displays in the Course Tools area of the Control Panel.


If you do not see it listed, expand the Customization area of the Control Panel and click Tool Availability.  Locate Groups Viewer in the list and click the check box next to it.


The Groups Viewer screen shows you the roster of the class and to which group each member belongs. The list can be sorted by Group, as well.


Buttons at the bottom of the page allow you to print the list or download it as a .csv.

More information about Blackboard Groups can be found at http://www.uhd.edu/computing/ttlc/training/documents/bblearn/Groups.pdf

Please contact UHD Blackboard Support at 713-221-2786 if you have any questions.

Thursday, May 31, 2012

What do the dates mean?

In assignment and test settings you have the option of setting three dates: Display After, Display Until, and Due Date.

Display After* – First date/time the assignment will be viewable for the students.

Display Until* – Last date/time the assignment will be viewable for students.  Students who are completing a test or assignment attempt will not have their sessions interrupted by the display until date expiring.

Due Date* - used by the Notification system to fill in the "To Do" module for students to know when an upcoming test/assignment/etc. is going to be due (or is past due).  The Notification system also uses the Due Date to fill in the instructor's "Alerts" module that lets them know when students have tests or assignments that are past due.

*Please keep in mind that you must check the box to the left of a date item if you want the date to apply.  Simply putting a date/time in the available areas does not make the date/time applicable. 

Dates in Assignment settings:


Dates in Test options:

For more information about creating Assignments in Blackboard, visit
http://www.uhd.edu/computing/ttlc/training/documents/bblearn/Assignments_Creating.pdf

Additional information regarding Test creation in Blackboard can be found at
http://www.uhd.edu/computing/ttlc/training/documents/bblearn/Assessments_Creating.pdf


Please contact UHD Blackboard Support at 713-221-2786 if you have any questions.

Allowing multiple attempts on tests?

If multiple attempts are allowed on tests the students must click the "take the Test again" link to begin remaining test attempts. Students begin remaining test attempts by:

1) Students navigate to their test and click on the test name.


2) In the "Begin test" window, students will click Begin (top or bottom link) to start the test.


3) If there is a previous test attempt, students will see the "Test previously taken" window. In this window students should click on the take the Test again link.

Note: The OK button DOES NOT begin a new attempt. Students clicking the OK button in the Test Previously Taken window will be taken to their previous attempt information.  

Additional information on Blackboard test creation can be found at
http://www.uhd.edu/computing/ttlc/training/documents/bblearn/Assessments_Creating.pdf

Training documents and videos for UHD Faculty and Staff are available at
http://www.uhd.edu/computing/ttlc/training/#fragment-2

Please contact UHD Blackboard Support at 713-221-2786 if you have any questions.


Wednesday, May 2, 2012

Assignment & Test Feedback Options


Assignments
While grading assignments, instructors can provide comments as well as upload a revised version of a student’s submission that contains comments within. 


These comments can be seen by students using the My Grades tool, as long as the assignment column is set to be visible to students.


Clicking on the grade score will provide more details to students.  Now the file the instructor attached can be opened.


Tests
1. To see the test options area, click the action link next to the test and click Edit Test Options.


2. Scroll down to section 5: Test Feedback. This governs what students see in their grades area.

This can be set so that when the test is available to students, only the Score is available to them upon completion of the test.  Then once the availability period is over, all options may be checked so that students can see the correct answers.  Students can review their tests by clicking the link of the score they received in My Grades.

Too many rows in your grade center?

Do you wish you could hide Grade Center rows so that you can show grades to only one student? Are you tired of seeing unavailable students in your Grade Center? 


Setting the Row Visibility in your Grade Center is the answer!

1.  To change row visibility, select Full Grade Center from the Control Panel.


2.  Click the Manage button at the top and select Row Visibility from the drop-down list.


3.  A list of Grade Center rows comprised of student names will appear.  Select the check box beside the rows you wish to hide, and click the Hide Rows button.


Please note that unavailable students are designated with a circle-backslash icon.

4.  After you click Hide Rows, the rows you have selected will become italicized.  Click the Submit button.


Please contact UHD Blackboard Support at 713-221-2786 if you have any questions.